Posts

To-Do List Revisited

Updated Master To-Do list, now including the basement! Basement Family Room 1. Tear out old carpet and padding 2. Paint walls 3. Paint doors and trim 4. Lay ceramic tile floor -  two/thirds done with this! 5. Build built-in desk - the base cabinets are ready to be installed! 6. Build and stain countertop for desk 7. Install baseboards, and paint them 8. Build shelves above desk 9. Build storage cubes/cubbies under stairs 10. Mount TV on wall between windows 11. Hire electrician to fix outlet below the TV so it's not controlled by the light switch 12. Install ceiling lighting...recessed pot lights? 13. Finally hang the artwork that I've been collecting for the last year or so :) 14. Replace 2nd window (one window was replaced by previous homeowners) 15. Sew and hang new curtains Basement Bedroom 1. Re-carpet floor 2. Remove wallpaper 3. Paint walls 4. Paint trim 5. Install better shelves in closet 6. Sew duvet cover for bed 7. Build a headboa...

Basement Moodboard

Image
Now that you've seen some of the progress on our basement remodel, I wanted to give you a taste of our vision for that space. First off, you've seen that the walls are painted beige, with white trim. Pretty traditional stuff. The floors will be a wood-grain ceramic tile, similar to this: This is not the exact tile we have, but it's as close as I could find...we got ours at a discount flooring outlet and bought all that they had. I'm not even sure what brand they are. But they are oblong ceramic tiles just like this that look like wood grain. They are all the same length, so we will stagger them to make it look like a hardwood floor, with very small grout lines. Since this will be a ceramic tile floor directly on a cement floor in a basement, the floor will be very cold. We couldn't afford the underfloor heating (it's about $179 for a 1' by 20' roll), so instead I have ordered a large area rug. RugsUSA was having their 80% sale again, which doesn...

Goodbye Smelly Carpet!

Image
Do y'all remember that we have a basement? It doesn't make many, if any, appearances in the blog. That's mainly because we haven't done a darn thing to it since J got the keys to the house. After helping my parents with their house during our summer vacation to Michigan in July, I think we found our motivation again, because we came home with big ideas and energy to attack the basement! Remember what it looked like before? It pretty much still looked exactly like that, except add a bajillion more stains on the carpet (they seemed to creep up from below!) So, the carpet had to go! Once we got all the carpet out, it was time to paint the walls. We wanted to do that before we put in the new floors, because I tend to be a messy painter :) Oh, hi Penny! The walls were like an off-white that had yellowed over time. And speaking of yellow, the stairwell was painted a hideous yellowish-green. SO BAD. Also, the "built-in" bookshelves left a nice ...

Transitions

Image
So here's something that was a long time in the making...transitions between different types of flooring! We have been living with gaps of about a half inch between the ceramic tile and the hardwoods. Also, the ceramic tile we laid by the back door had started to come loose, so it was time to address all of those issues. We pulled up the loose tiles and could see that the tiles hadn't completely bonded with the mortar. You can see where only the center of each tile had stuck. So, we pulled all of them up, chipped up the old dried mortar, and re-laid the tiles. Then, J re-grouted the tiles...he loves when his picture makes it into my blog :) The new grout was slightly darker than the original grout, but it turned out alright. As for the transitions, we bought T-moldings from Lowe's that matched our flooring. Well, they aren't an exact match...in order to get the ones that match our floor exactly, we would have to special order them and they'd be ar...

House To-Do List: Updated

So, I found this old master to-do list I posted over a year ago. Let's see what all we have accomplished in the last 14 months! I've also added some new things to the list, in blue. Living Room 1 . Install trim around window 2. Install crown molding 3. Fill nail holes and paint trim 4. Hang curtains 5. Finish spray-painting fireplace doors and re-install 6. Figure out what to do around the fireplace (tile? mantle surround?) and then do it 7. Fix door handle on closet 8. Organize closet (DVD's, CD's, books) these are now downstairs 9. Figure out something to do about brick hearth (paint? resurface?) 10. Replace entry door (preferably something with blinds or curtains) 11. Research and buy/build some sort of storage system for closet Master Bathroom 1. Sand walls and re-paint for a smooth finish 2. Install shower head and faucet 3. Seal grout in the shower 4. Install hardware (towel bars, toilet paper dispenser, etc) 5. Figure out and install some st...

M is for McFrugal

Image
After we got married, I wanted to integrate my new monogram into our home decor. I found this paper maché M at Michaels, and thought I would do an interesting paint treatment on it. So I just set up a station, using push pins to prop up the M while I painted it.   My first coat of paint was a beautiful turquoise, over which I painted a coat of brown paint.  Then I painted a layer of crackle medium over the brown layer, so that the turquoise paint would show through the cracks. Buuuuuuuuut I tried to skimp and just get one-step crackle medium and it DID.NOT.WORK.  So, plan B! When you can't paint it how you like, cover it up! I saw an idea on Pinterest for a letter wrapped in twine to hang on the front door. Here was my inspiration:  Source: Pinterest I found a spool of twine at Walmart for only $1.99. I bought 2 rolls, but only ended up using part of one. I also used a hot glue gun for this project. I only glued in the back, so each t...

I'm baaaaaaack!

Image
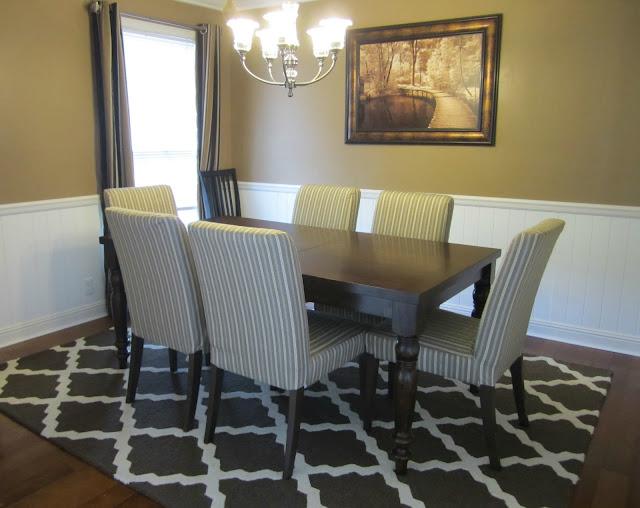
Yikes, I didn't mean to take such a long break from blogging!! It just sort-of...happened. But I'm back and I've got some fun updates to share with you!! First, I don't think I ever posted a picture of the dining room once we got our new rug. Here she is! Isn't it lovely? Those chairs are from IKEA that we purchased with our tax refund. I love them because the slipcovers can be changed as often as we like! The table is one that we found at Big Lots a long time ago. So far, we've dropped/spilled a couple things on the rug and the spots have come out right away with no problems, even on the ivory stripes. We're completely happy with the purchase! And at just around $200, we feel like we got a bargain for a 7'6" by 9'6" rug. Next, we had been tossing around the idea of changing the ceiling fan in our bedroom. The one in there was an old, white fan with a globe light that didn't give off enough light for us. It also looked very da...