I am a 30-something blogger living in Nashville, TN with my husband, J. He bought the house in September 2011 and we have been fixing it up ever since. We got married in December 2012.
I think we're pretty dang cute, if I do say so myself.
After we got all the old floors removed, it was time to prep some cabinets for our built-in desk. We went with pre-fab kitchen base cabinets because they were already built and they were 15% off at Home Depot. Why did we want to install those before we laid the floor? Well, because kitchen base cabinets have a standard height of 36", and desks have an average height of 32", and we knew that the tile floor would add about 3/4" of height, so we wanted those base cabinets to sit as low as possible when all was said and done. We also decided to lower the cabinets even more by cutting them off from the bottom. Here's a shortened cabinet vs. the original height of the base cabinet, side by side: First, we had to prep the cabinets for their "haircut": We removed all of the "brackets" that were holding the bottom boards on. I believe those boards around the bottom are called "toe kicks" or "toe strips". The toe kick in the ...
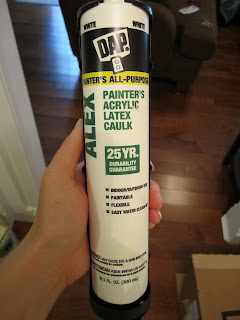
...and by "favorite," I obviously mean least favorite, worst part of installing new trim: caulking and filling nail holes. What you'll need if you're about to tackle a caulking project: Painter's caulk (duh) Caulking gun Paper towls Wet rag That's it! We chose to use DAP brand Painter's Acrylic Latex Caulk for about $1.52 a tube at Lowes. One tube can get you pretty far, but we have a lot of trim (wainscoting, chair rail, etc.) so I estimated about one tube per room. Make sure you get the paintable kind!! So as a reminder, here's a picture of a corner of crown moulding pre-caulk. It's all gappy and ugly, right? Here it is with the caulk fresh out of the caulking gun, still all goopy and messy. Not much better, really... Here's where the magic happens. The only tool you need for smoothing caulk is...wait for it...your finger! You don't need one of those "pro caulk" tools or anything, so don't waste y...
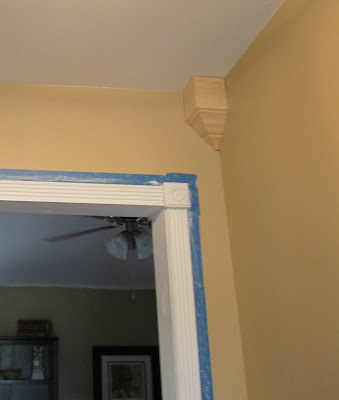
Yeah you guessed it, this is an update about trim. We finally got James' tools back after he lent them to a friend, so we were able to put up the crown molding in the entryway and dining room. We were tired of messing with figuring out the right angles for crown (upside down and backwards?? WHAT?!), so we decided to cheat and get corner blocks: No, it's not meant to be the same color as the wall, it just looks close. It will get painted white. If you're going to be hanging crown any time soon, we found that the easiest way is to find and mark your studs first, like so: Then, just start at one end with a pneumatic nail gun and work your way to the other end, putting in one nail on the bottom and one on the top at each stud. You can also use nails wherever it looks gappy. Yeah, that's an official term. The pressure from the pneumatic nail gun should suck most gaps closed. Here's the first piece all done: Much easier than the whole "upside dow...


Yes, You make an extremely cute couple!!
ReplyDeleteYour cousin, Dena