Posts

Showing posts from 2013

Post-Wedding Catch-up

Image
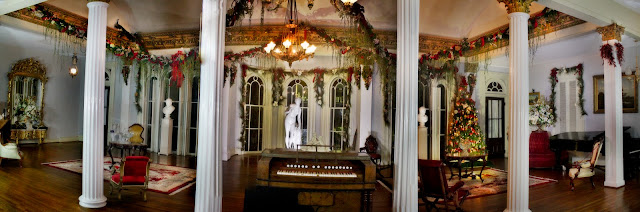
So who wants to hear about my wedding and how I kept it on a tight budget? It's been almost a year now...so it's probably time to share the deets. The date we chose for our wedding was December 29th, 2012. (Yes, less than 4 months after the day we got engaged). We chose a date close to Christmas because we thought it might be easier, since the family was already planning on getting together in Tennessee for Christmas anyway--this would save them another trip to Tennessee later. Also, we suspected there might be another family wedding during the summer of 2013--and it turns out we were right! One of my cousins was married in Pittsburgh in August. First, let's get the setting...J and I picked the Belmont Mansion in Nashville for both our ceremony and reception. We had no connection to the university--we just thought it was a beautiful location, reasonably priced, and was available on the date we wanted. They even included tables, chairs, and table linens in the price. Plu

The Giraffe in the Room

Image
What do giraffes have to do with our basement renovation? Oh just wait...you're about to find out. Last time you saw our basement bedroom, this is what it looked like. We had a mixture of floral wallpaper and sponge painting. Also some pretty terrible carpet. Lovely, right? Needless to say, we could hardly wait to get in there and gut it. We started by ripping out the carpet, and then it was time to attack the wallpaper. After reading a bit about the best way to remove wallpaper, I decided to use the steam method. I have a portable steamer that is used for removing wrinkles from clothes, so I decided to give that a whirl. It worked very well! The wallpaper came off in 2 layers...1st the decorative paper layer, and then the adhesive layer. It was a timely process, but it did work very well. So now, to address the giraffe in the room...this is what we found underneath the wallpaper: Oh.my.goodness. Yes, it really was this hideous in person. No wonder someone wallpape

Counters and Floors

Image
When we left off last week, we had just installed the base cabinets for our desk. Now let's talk about the desktops we built and installed. We contemplated all sorts of different options...we thought about butcher block, but knew it would have to be custom ordered to size = pricey. We looked at some other options in the home improvement store, but everything was either not wide enough (we needed a depth of 25") or not thick enough. Then I remembered an old blog post by my favorite DIYers over at Young House Love, when they built a 13' long built-in desk and used 2 by's for the top. So we picked up a few 2 x 10's and a couple 2 x 8's, not knowing which combination would be the charm (since 2 x 10's are not truly 10 inches wide, nor are 2 x 8's truly 8 inches wide). The combination of two 2 x 10's and one 2 x 8 ended up being the perfect depth, and we wouldn't have to rip down any boards! Here are the boards all cut to length and ready to

Trimming Cabinets

Image
After we got all the old floors removed, it was time to prep some cabinets for our built-in desk. We went with pre-fab kitchen base cabinets because they were already built and they were 15% off at Home Depot. Why did we want to install those before we laid the floor? Well, because kitchen base cabinets have a standard height of 36", and desks have an average height of 32", and we knew that the tile floor would add about 3/4" of height, so we wanted those base cabinets to sit as low as possible when all was said and done. We also decided to lower the cabinets even more by cutting them off from the bottom. Here's a shortened cabinet vs. the original height of the base cabinet, side by side: First, we had to prep the cabinets for their "haircut": We removed all of the "brackets" that were holding the bottom boards on. I believe those boards around the bottom are called "toe kicks" or "toe strips". The toe kick in the