Counters and Floors
When we left off last week, we had just installed the base cabinets for our desk.

Now let's talk about the desktops we built and installed. We contemplated all sorts of different options...we thought about butcher block, but knew it would have to be custom ordered to size = pricey. We looked at some other options in the home improvement store, but everything was either not wide enough (we needed a depth of 25") or not thick enough. Then I remembered an old blog post by my favorite DIYers over at Young House Love, when they built a 13' long built-in desk and used 2 by's for the top. So we picked up a few 2 x 10's and a couple 2 x 8's, not knowing which combination would be the charm (since 2 x 10's are not truly 10 inches wide, nor are 2 x 8's truly 8 inches wide). The combination of two 2 x 10's and one 2 x 8 ended up being the perfect depth, and we wouldn't have to rip down any boards!
Here are the boards all cut to length and ready to be sanded and stained:

With a palm sander, I made sure to sand off any markings and imperfections. I also wanted the boards to be smooth to the touch, since it will be a desk that we plan to use a lot once the room is finished! I used a 100 grit sandpaper first, and then went back over it with a 150 grit to get a smoother finish.
Finally, I was ready for stain. I set my boards up in the exact way I wanted them once installed, so I knew exactly which edges needed to be finished and which would be hidden and I could ignore. I used Minwax Dark Walnut 2716.

I just brushed on the stain with an cheap paintbrush, allowed it to soak in for a few minutes, and then wiped off any excess with an old rag. Here it is after the first coat of stain:

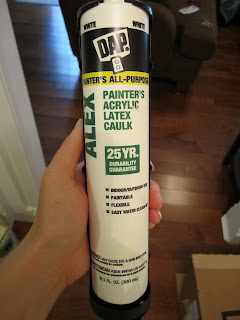
I did one more coat of stain, and then allowed that to dry overnight. When I came back to it the next day, I was ready for polyurethane. I used Minwax for that as well, but I don't have a picture of the can. We had it left over from another project.
Since the poly is oil-based, I used a cheap (but new and nice) paintbrush that I could throw away after, since I personally hate cleaning oil-based products out of brushes. Here are the boards after one coat of poly and a light sanding with a high-grit sandpaper:

One more coat of poly, another light sanding, and these puppies were ready to dry overnight. The next step was installation! Since our base cabinets didn't have any braces across the top for installing a countertop, we had to get creative. We found some small brackets to use for installation.

We chose to use 1 1/2 inch braces. We needed 12 of them, as we planned to use 4 per board (2 per cabinet, per board). There was no easy way to install these brackets, so we had to pull the drawers and shelves out of the cabinets and go in from underneath.
That's my awesome hubby doing all the dirty work while I take pictures. I also had to sit on the desktop while he installed it, to make sure it was snug. I'm pretty sure I should have been insulted by that request.
Anyhoozle, here's what those braces look like once installed from underneath:

Notice, we didn't put screws in every hole...we thought that would be overkill. So after doing that on each side of the insides of the cabinets, a total of 12 times, our desktop was installed! Are you ready to see the finished product?
Here we go!


We will probably try to install a drawer in the center at some point, but for right now we're just really happy with the desk the way it is! We still have to figure out a chair...it's slightly higher than a standard desk, so finding a chair that is a comfortable height will probably be a challenge. But I'm a pro at shopping, so I'm up for it!
What's that you say? You want to see more shots of that gorgeous tile floor we finally finished?? Ok!


Well, those are all the updates I have for now! Hopefully soon we will start emptying the bedroom into this room, so that we can tear off the wallpaper and install new floors in there, too! We're thinking laminate...it's such an affordable option that looks better than carpet, which is originally what we were thinking for the bedroom. Carpet just gets so dirty, especially with pets...of which we have 3. Here's a gratuitous puppy picture:

Happy Fall!!

Now let's talk about the desktops we built and installed. We contemplated all sorts of different options...we thought about butcher block, but knew it would have to be custom ordered to size = pricey. We looked at some other options in the home improvement store, but everything was either not wide enough (we needed a depth of 25") or not thick enough. Then I remembered an old blog post by my favorite DIYers over at Young House Love, when they built a 13' long built-in desk and used 2 by's for the top. So we picked up a few 2 x 10's and a couple 2 x 8's, not knowing which combination would be the charm (since 2 x 10's are not truly 10 inches wide, nor are 2 x 8's truly 8 inches wide). The combination of two 2 x 10's and one 2 x 8 ended up being the perfect depth, and we wouldn't have to rip down any boards!
Here are the boards all cut to length and ready to be sanded and stained:

With a palm sander, I made sure to sand off any markings and imperfections. I also wanted the boards to be smooth to the touch, since it will be a desk that we plan to use a lot once the room is finished! I used a 100 grit sandpaper first, and then went back over it with a 150 grit to get a smoother finish.
Finally, I was ready for stain. I set my boards up in the exact way I wanted them once installed, so I knew exactly which edges needed to be finished and which would be hidden and I could ignore. I used Minwax Dark Walnut 2716.

I just brushed on the stain with an cheap paintbrush, allowed it to soak in for a few minutes, and then wiped off any excess with an old rag. Here it is after the first coat of stain:

I did one more coat of stain, and then allowed that to dry overnight. When I came back to it the next day, I was ready for polyurethane. I used Minwax for that as well, but I don't have a picture of the can. We had it left over from another project.
Since the poly is oil-based, I used a cheap (but new and nice) paintbrush that I could throw away after, since I personally hate cleaning oil-based products out of brushes. Here are the boards after one coat of poly and a light sanding with a high-grit sandpaper:

One more coat of poly, another light sanding, and these puppies were ready to dry overnight. The next step was installation! Since our base cabinets didn't have any braces across the top for installing a countertop, we had to get creative. We found some small brackets to use for installation.

We chose to use 1 1/2 inch braces. We needed 12 of them, as we planned to use 4 per board (2 per cabinet, per board). There was no easy way to install these brackets, so we had to pull the drawers and shelves out of the cabinets and go in from underneath.
 |
| Oh, hey finished floor! |
Anyhoozle, here's what those braces look like once installed from underneath:

Notice, we didn't put screws in every hole...we thought that would be overkill. So after doing that on each side of the insides of the cabinets, a total of 12 times, our desktop was installed! Are you ready to see the finished product?
Here we go!


We will probably try to install a drawer in the center at some point, but for right now we're just really happy with the desk the way it is! We still have to figure out a chair...it's slightly higher than a standard desk, so finding a chair that is a comfortable height will probably be a challenge. But I'm a pro at shopping, so I'm up for it!
What's that you say? You want to see more shots of that gorgeous tile floor we finally finished?? Ok!


Well, those are all the updates I have for now! Hopefully soon we will start emptying the bedroom into this room, so that we can tear off the wallpaper and install new floors in there, too! We're thinking laminate...it's such an affordable option that looks better than carpet, which is originally what we were thinking for the bedroom. Carpet just gets so dirty, especially with pets...of which we have 3. Here's a gratuitous puppy picture:

Happy Fall!!


Comments
Post a Comment