Fireplace Makeover
This post is a long time coming...I got a bit distracted with getting married in December, so I'm just now getting around to posting this official reveal.
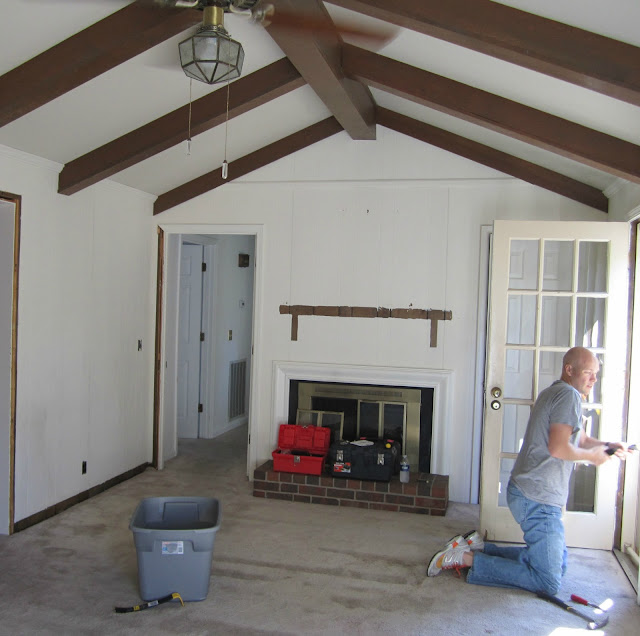
Let's take a look back at the original fireplace on the day J got the keys to the house, back in September of 2011:
Lovely, right? It had a basic wooden mantel shelf that we tore out (I don't think we got a picture of that before we tore it out).
Here's another look at it once we had replaced all the wood paneling with drywall, but still not much progress was made around the fireplace.


Then, the fireplace sat at that stage for about a year. Sad, I know! We just couldn't make a decision on what to do around the fireplace. Finally, we found some stone tiles that we loved at Lowe's, and decided to go for it. We did this makeover in just one weekend, once we actually got started. Here's the first picture of covering up the bricks:

J used liquid nails to apply the stone tiles to the bricks, and it has held up quite well. When we got to this point, we needed to apply the hearth before we could tile any further up the wall. J had ordered a piece of granite to size, so with the help of the friend, he glued down the granite slab and continued tiling up the wall, still using liquid nail to attach the stone tiles. Here's what that looked like:

As you can see, we also installed the fireplace doors before we tiled up the walls, so that the stone would butt right up against the doors. At this point, we were ready to install our mantel! We bought a primed mantel shelf at Lowe's that looked like the rest of the trim in the room. Are you ready? Here's the reveal!

This is what the fireplace looked like right before Christmas, which is when we finished this project. Let's get some detail shots of that stonework, shall we?


There you have it! Here is a look at what our fireplace looks like today, with our wedding pictures and fireplace accessories:

Let's take a look back at the original fireplace on the day J got the keys to the house, back in September of 2011:

Lovely, right? It had a basic wooden mantel shelf that we tore out (I don't think we got a picture of that before we tore it out).
Here's another look at it once we had replaced all the wood paneling with drywall, but still not much progress was made around the fireplace.

We did put cement backer-board around it, with a future plan of tiling. We had also installed hardwood floors and painted the walls in this stage.
At some point, I painted the fireplace doors, knowing that we wouldn't want the brass doors. We did look at replacing them entirely, but it was waaaaaaaaay too expensive! I used high-heat resistant grill spray paint, in case anyone is curious.


J used liquid nails to apply the stone tiles to the bricks, and it has held up quite well. When we got to this point, we needed to apply the hearth before we could tile any further up the wall. J had ordered a piece of granite to size, so with the help of the friend, he glued down the granite slab and continued tiling up the wall, still using liquid nail to attach the stone tiles. Here's what that looked like:

As you can see, we also installed the fireplace doors before we tiled up the walls, so that the stone would butt right up against the doors. At this point, we were ready to install our mantel! We bought a primed mantel shelf at Lowe's that looked like the rest of the trim in the room. Are you ready? Here's the reveal!

This is what the fireplace looked like right before Christmas, which is when we finished this project. Let's get some detail shots of that stonework, shall we?


There you have it! Here is a look at what our fireplace looks like today, with our wedding pictures and fireplace accessories:

I look forward to decorating the mantel for each holiday!If you have any questions about the process, please don't hesitate to ask! This was probably one of the easiest and quickest updates we have done that made the biggest impact, and we are so thrilled with the results!
P.s. I should mention that we read online about granite not being a good choice for fireplace hearths, as it is not heat-resistant, but we have had absolutely zero problems with it. We are just careful not too build too large a fire, which I think is a good safety practice anyway!
Fantastic job ! But your mantel shelf is too small. You need a wider one.
ReplyDelete