Rebuilding the Kitchen
Picking up where we left off...the date is Tuesday April 7, 2015. James and I took the day off work so that we could install the cabinets, since my family was coming that following weekend to visit.
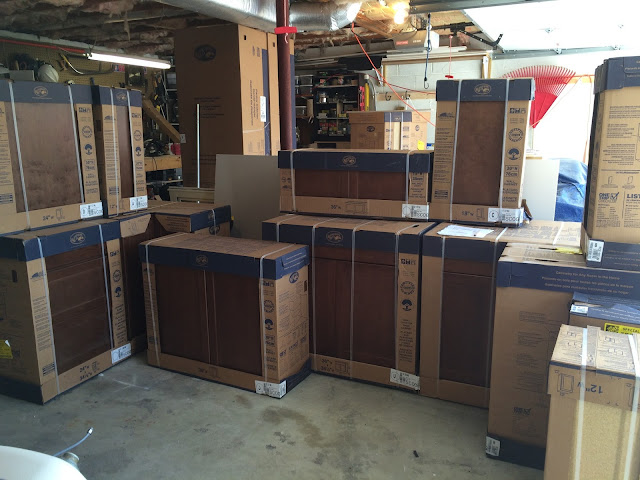
First, we laid out all the cabinets in the garage as best we could:
We researched and found that it was best to start with the upper cabinets, because it's easier to hang them when there's nothing in the way below.
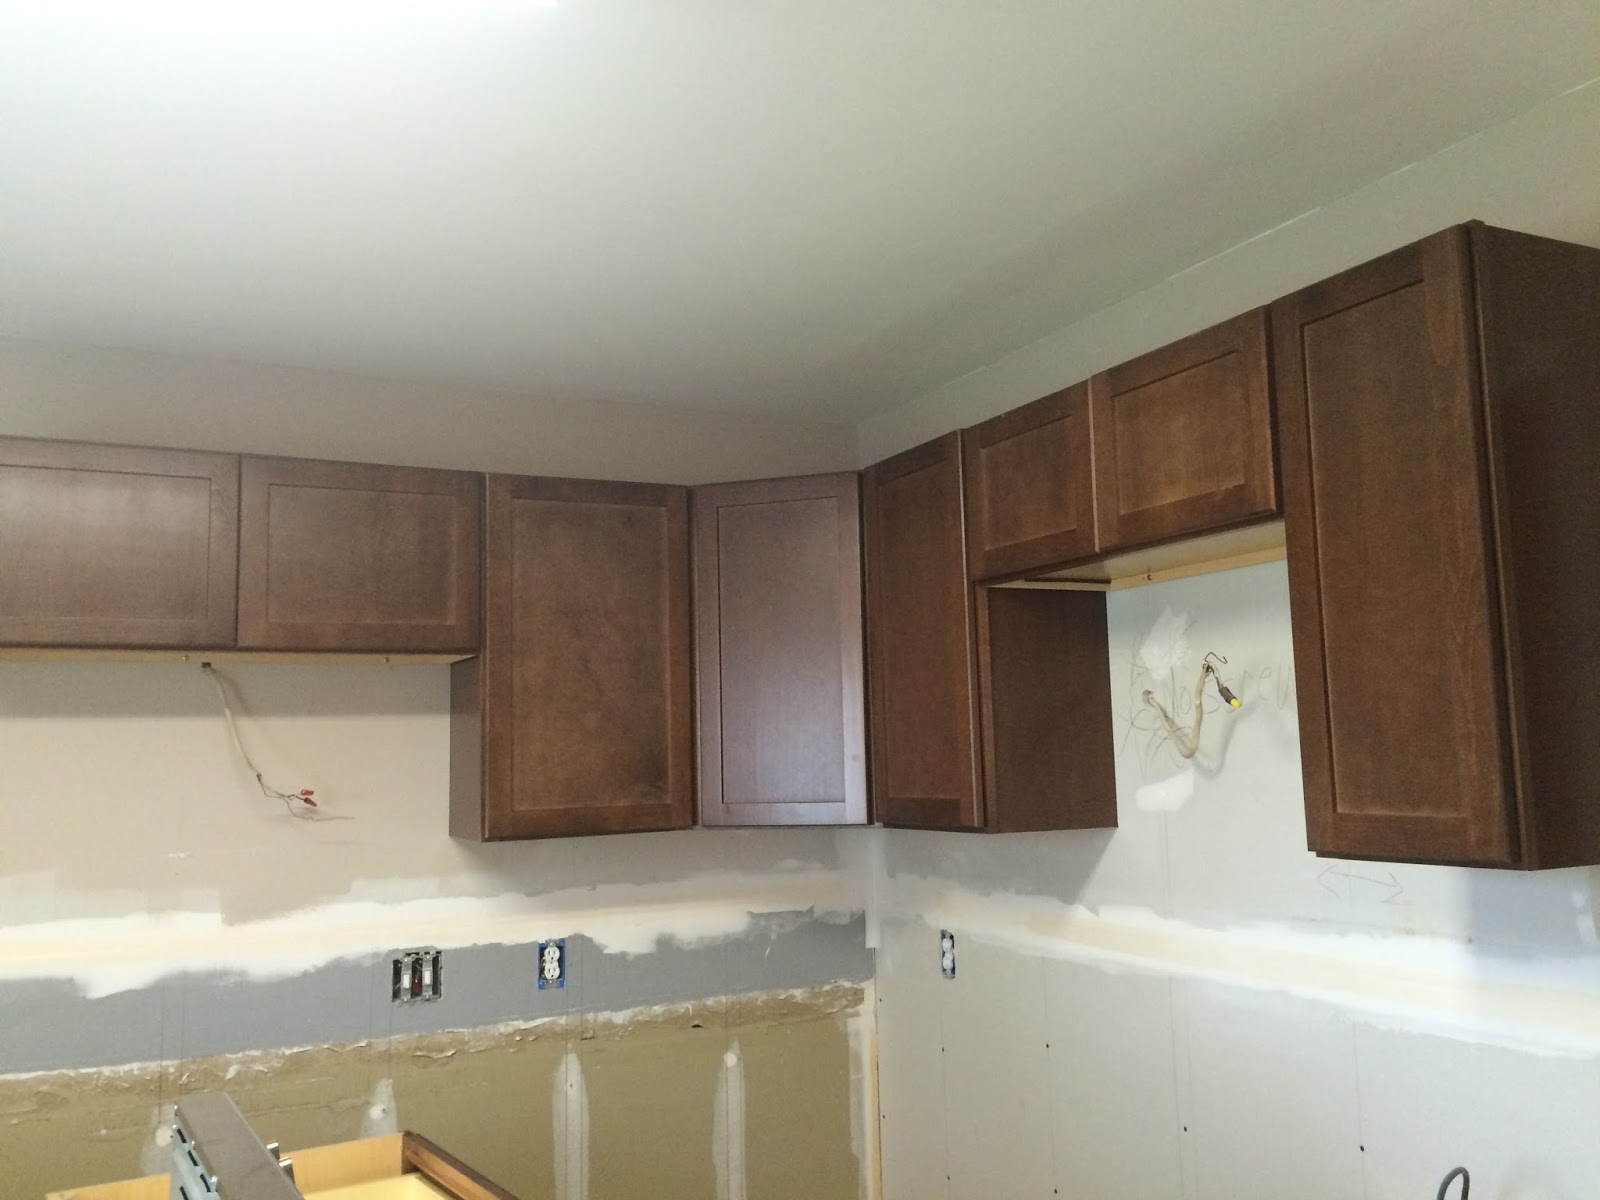
Hanging the upper cabinets was actually much easier than we expected it to be. We hung a 2x4 "cleat" around the perimeter of the room to rest the upper cabinets on while we installed them. Then it was simply a matter of screwing through the back of the cabinets into the studs, then screwing the front faces of the cabinets together. The recommendation was to start in a corner and work your way outward. We started in the corner closest to the stove, and here is what those cabinets looked like:


First, we laid out all the cabinets in the garage as best we could:

We researched and found that it was best to start with the upper cabinets, because it's easier to hang them when there's nothing in the way below.
Hanging the upper cabinets was actually much easier than we expected it to be. We hung a 2x4 "cleat" around the perimeter of the room to rest the upper cabinets on while we installed them. Then it was simply a matter of screwing through the back of the cabinets into the studs, then screwing the front faces of the cabinets together. The recommendation was to start in a corner and work your way outward. We started in the corner closest to the stove, and here is what those cabinets looked like:

Then we worked our way over to the left side, to the opposite corner.
We "hit a wall" in the other corner, so to speak. We had measured our walls and they were the exact correct length to fit all the cabinets we had ordered, in theory. But somewhere along the way of installation, we lost 1/2" because our last cabinet was 1/2" too large to fit. So, we had to go exchange a 36" upper cabinet for a 30" upper cabinet. This was really disappointing, as we were going to lose 6" of cabinet space because we were short by 1/2" but there wasn't anything we could do about it, short of taking down all the cabinets we had hung and shave each of them down to make up the 1/2".
In the following pictures, you'll also see base cabinets in place, as well as counters and a sink. We simply set all of the base cabinets with the old counters on top so that my family would have some semblance of a kitchen while they were visiting!


We took a break from kitchen renovation the weekend of April 11-12th for Grandma's 80th birthday party and visiting with family :)
The following Saturday, we were back at it again attempting to install base cabinets. We quickly discovered that we had a serious problem with the kitchen floor. From the exterior wall to the inside wall, the floor sagged about 2 inches! There was no way we could install cabinets level on a floor like that, and also take the chance that the floor would continue to sag. Luckily, the bedroom below the kitchen has a drop ceiling, so we tore that out and got to work. We built a beam out of three 2x10x12's glued and bolted together:

Next, we had to buy 2 posts, and find places to put them where they wouldn't be seen. We decided that we would put one in the garage just outside of the bedroom wall, and the other inside the bedroom closet wall.


So once the posts and beam were in place (with the help of my cousin to lift the beam into place), all we had to do was crank the posts to raise them up until it raised the floor to level.


Here's a level on one of the floor joists after the beam had been cranked up. Pretty darn good!

Of course we knew the kitchen floor would never be perfect, but at least this gave us peace of mind that our kitchen wouldn't collapse under the weight of all the new cabinets and appliances, or that our new floors and counters wouldn't crack if the floor continued to sag.
Once the floor was leveled out and supported, it was time to install the floor tile. We decided to go with a wood-look porcelain tile in a light beige. We ordered the tile online and had to drive about an hour away to pick it up from a FedEx shipping facility (which was an interesting experience in and of itself!). Here's the pallet of tile in the back of our truck:

We decided to lay the tile in a herringbone pattern, which is a very difficult pattern to lay but we knew would be worth the extra work. Here is the pattern as James was dry-fitting it:
 |
| Monday, April 20, 2015 |
James took some time off work that week and continued to lay tile:
 |
| Thursday, April 23, 2015 |
Then we finally finished laying all the tile and grouting it on Saturday, May 2:

The following Saturday, we were finally able to start installing the base cabinets. Here's a look at the first 2 cabinets installed against the exterior wall (the left side of the picture), and if you look closely you can see a shadow beneath the cabinets on the right side of the picture. That is because we had to raise them up to match the height of the first two cabinets, so obviously the floor was still slanted quite a bit.
 |
| Saturday, May 9, 2015 |
When we got over to the other corner, we encountered yet another set-back. The cabinets they had given us for the corners technically fit in the space (a blind corner cabinet and a 15" base), but the drawers would have hit each other when they opened, and they didn't even have hardware on yet!

So yet again, we had to exchange it for a smaller cabinet and order a 3" filler piece to fill the gap and allow the drawers to open freely. We swapped it out for the 12" cabinet that we had for the other side of the stove so that we could continue working. Here are all of the base cabinets installed, with the exception of the cabinet to the right of the stove, and all the doors.


We also moved over to the other side of the kitchen and installed two pantry cabinets and some other cabinets over and around the fridge.
 |
| Sunday, May 10, 2015 |

In my next post, I'll show you how we finished the cabinets with hardware and trim, as well as the tile back-splash and other finishing touches in the kitchen.


Comments
Post a Comment