Painting the Stripes and the Big Reveal
I know, most "real" bloggers don't post on Sundays, but this is my blog and I do what I want!
When we left off on Friday, I had just finished taping off the room in preparation for my stripes. Before I started painting on Saturday, I made sure the tape was smoothed out and stuck on all the edges so I didn't have any leakage. I didn't want to use my fingers because that was a LOT of tape to smooth, so I used the edge of a credit card.
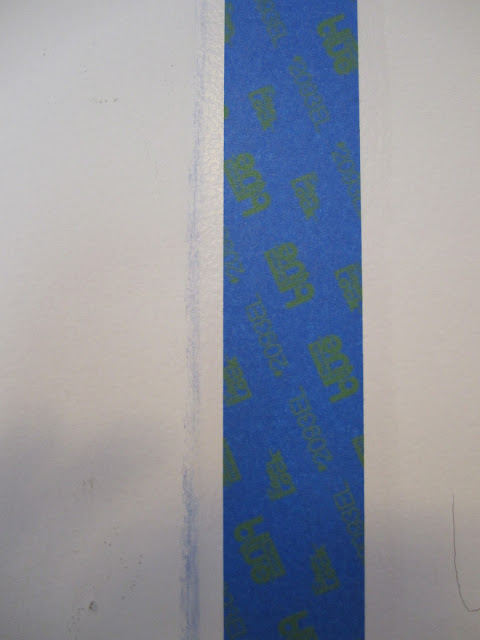
Notice I put my tape to the side of my chalk lines, so that the darker gray paint will cover them up. Next step was to decide how I wanted my stripes to start and end, where they would meet the solid (non-striped) walls. I didn't want the last stripe to carry over onto the solid wall, so I decided to do them opposite colors. I wrote D's and L's in pencil (for Dark and Light gray) to get me started in the corner where the stripe met the solid wall.

Then I started with the light gray paint! The paint I chose is called "Secret Passage" by Olympic. I just painted every other stripe, as well as the wall with the door and closet.


My stripes were wide enough that I could use a standard paint roller, which was nice because I also used it on the solid wall. This way, I didn't have to use two different rollers. I did two coats and let this dry overnight.
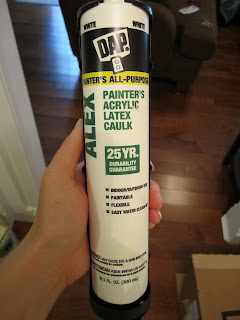
On Sunday, I started painting the darker gray. That paint is called "Flagstone" by Olympic, and it's the same color I used in the kitchen and main bathroom.

I also painted the wall with the window.

Next, I let everything dry for a few hours. This is what the tape looked like under all that paint...

I promise, it's under there somewhere!
Are you ready for the big reveal? Here we go...

Ooooooh....next is a final shot of all 4 corners of the room, starting where the two striped walls meet and going counter-clockwise.


I LOVE IT!! I'm not sure that James was entirely sold on the concept, until he saw it all done. I still have a few places to touch up, like where I got a little happy with the roller and accidentally went over the tape onto the lighter gray, or where the tape pulled away some of the paint near the ceiling (oops! guess I didn't wait long enough to pull off the tape, but I wanted to see it!!!).
There you have it, the painting in here is done! (except the touch-ups, but I'll do that later). Right now, I'm just really excited with how it turned out! I couldn't be more pleased with the results. I think it will be a perfect guest room/creative space, and future nursery.
When we left off on Friday, I had just finished taping off the room in preparation for my stripes. Before I started painting on Saturday, I made sure the tape was smoothed out and stuck on all the edges so I didn't have any leakage. I didn't want to use my fingers because that was a LOT of tape to smooth, so I used the edge of a credit card.

Notice I put my tape to the side of my chalk lines, so that the darker gray paint will cover them up. Next step was to decide how I wanted my stripes to start and end, where they would meet the solid (non-striped) walls. I didn't want the last stripe to carry over onto the solid wall, so I decided to do them opposite colors. I wrote D's and L's in pencil (for Dark and Light gray) to get me started in the corner where the stripe met the solid wall.

Then I started with the light gray paint! The paint I chose is called "Secret Passage" by Olympic. I just painted every other stripe, as well as the wall with the door and closet.


My stripes were wide enough that I could use a standard paint roller, which was nice because I also used it on the solid wall. This way, I didn't have to use two different rollers. I did two coats and let this dry overnight.
On Sunday, I started painting the darker gray. That paint is called "Flagstone" by Olympic, and it's the same color I used in the kitchen and main bathroom.

I also painted the wall with the window.

Next, I let everything dry for a few hours. This is what the tape looked like under all that paint...

I promise, it's under there somewhere!
Are you ready for the big reveal? Here we go...

Ooooooh....next is a final shot of all 4 corners of the room, starting where the two striped walls meet and going counter-clockwise.


 |
| Make sure you have a cat in the window to inspect your work. |

I LOVE IT!! I'm not sure that James was entirely sold on the concept, until he saw it all done. I still have a few places to touch up, like where I got a little happy with the roller and accidentally went over the tape onto the lighter gray, or where the tape pulled away some of the paint near the ceiling (oops! guess I didn't wait long enough to pull off the tape, but I wanted to see it!!!).
There you have it, the painting in here is done! (except the touch-ups, but I'll do that later). Right now, I'm just really excited with how it turned out! I couldn't be more pleased with the results. I think it will be a perfect guest room/creative space, and future nursery.


I think it looks GREAT!
ReplyDeleteThis is awesome! I would be soooo proud of these walls if I were you. Looks great!
ReplyDeleteThanks, Niko! (do people still call you that?)
Delete