Guest Room/Craft Room/Office/Future Nursery??
Yes...as the title suggests, this room has a lot to live up to! Lately, it has just been a collect-all for extra furniture or other items for which we don't have a specific place yet. NO MORE! As part of my own personal "Dude, Get On that Already" challenge (inspired by Young House Love's challenge of the same name), I decided to take matters into my own hands and paint this room, so we can actually start using it.
Part of it was inspired by my need to empty the extra bedroom (read: my storage room) at the house I'm renting, and since I have nowhere to put it, it ended up in James' garage. Buuuuut I know that's going to drive him crazy, since the garage is his "man space." Since most of it is stuff I haven't been able to use recently (scrapbooking supplies, sewing machine, other small projects I've been wanting to tackle) I thought it might be nice to go ahead and put them in their forever home--the guest/craft/office room!
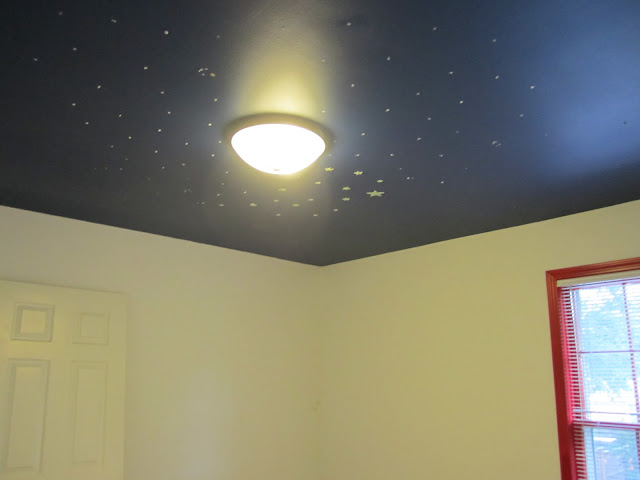
When James bought the house back in September, this room had a navy blue ceiling with glow-in-the-dark stars stuck to it. Yikes.
 The walls appeared to be the original builder flat white paint, so naturally, they were all scuffed. Also, previous owners through the years seemed to really enjoy using drywall anchors to hang EVERYTHING, so we had about 20 of those suckers to deal with in this room alone.
Months ago, I tackled the ceiling. I knew I wanted to do it before we got the hardwood floors installed, and I'm glad I did. After removing the stars (and sanding off the putty used to stick them up), three coats of ceiling paint did the trick. Muuuuuch better, wouldn't you agree?

Now, what about that pesky red window? Who knows why it was red...we actually met the previous owners once and asked them about it, they said it was red when they bought the house and they never changed it. Since James didn't have the $$$ for brand new windows right away, I decided to paint it. After a couple coats of white trim paint, it became quite apparent that the easiest thing to do is just replace this window! I think I'll just hang some curtains in front of it for now and call it good :-/

So there the room sat for quite some time, with freshly installed hardwood floors, a newly painted white ceiling, and a partially painted red/white window. It began to be the "catch-all" room as James moved in and there were not places for everything. It even had some of his former roommate's furniture in it...not sure how that ended up upstairs!
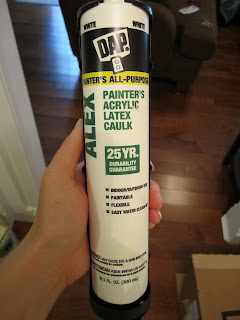
This last weekend, I decided to finally tackle this room. First, I had to deal with those pesky drywall anchors. Having attempted to remove these before in the master bathroom, I knew it wasn't going to be pretty...times twenty. But then I remembered having seen this tip on YHL and decided to give it a try. Basically, I just hammered them in a little (with a small, lightweight hammer...we're not trying to punch holes in the walls here!), then spackled over them for a smooth look.

The next day, I sanded all the spots with a sanding block. I much prefer a sanding block to a piece of sanding paper, because it gives you a much more "even" sanding. With a piece of sandpaper, you might naturally apply more pressure in one spot and it could gouge out some areas...not pretty.
While the spackle was drying, James and I emptied out the room and I prepped the floors with some red rosin paper, leftover from a previous project. We don't want to get paint on the brand new hardwood floors!!
 That was all in a day...next post, I'll go over the color scheme for this room and prepping it for paint!
Part of it was inspired by my need to empty the extra bedroom (read: my storage room) at the house I'm renting, and since I have nowhere to put it, it ended up in James' garage. Buuuuut I know that's going to drive him crazy, since the garage is his "man space." Since most of it is stuff I haven't been able to use recently (scrapbooking supplies, sewing machine, other small projects I've been wanting to tackle) I thought it might be nice to go ahead and put them in their forever home--the guest/craft/office room!
When James bought the house back in September, this room had a navy blue ceiling with glow-in-the-dark stars stuck to it. Yikes.

Months ago, I tackled the ceiling. I knew I wanted to do it before we got the hardwood floors installed, and I'm glad I did. After removing the stars (and sanding off the putty used to stick them up), three coats of ceiling paint did the trick. Muuuuuch better, wouldn't you agree?

Now, what about that pesky red window? Who knows why it was red...we actually met the previous owners once and asked them about it, they said it was red when they bought the house and they never changed it. Since James didn't have the $$$ for brand new windows right away, I decided to paint it. After a couple coats of white trim paint, it became quite apparent that the easiest thing to do is just replace this window! I think I'll just hang some curtains in front of it for now and call it good :-/

So there the room sat for quite some time, with freshly installed hardwood floors, a newly painted white ceiling, and a partially painted red/white window. It began to be the "catch-all" room as James moved in and there were not places for everything. It even had some of his former roommate's furniture in it...not sure how that ended up upstairs!
This last weekend, I decided to finally tackle this room. First, I had to deal with those pesky drywall anchors. Having attempted to remove these before in the master bathroom, I knew it wasn't going to be pretty...times twenty. But then I remembered having seen this tip on YHL and decided to give it a try. Basically, I just hammered them in a little (with a small, lightweight hammer...we're not trying to punch holes in the walls here!), then spackled over them for a smooth look.

The next day, I sanded all the spots with a sanding block. I much prefer a sanding block to a piece of sanding paper, because it gives you a much more "even" sanding. With a piece of sandpaper, you might naturally apply more pressure in one spot and it could gouge out some areas...not pretty.
While the spackle was drying, James and I emptied out the room and I prepped the floors with some red rosin paper, leftover from a previous project. We don't want to get paint on the brand new hardwood floors!!


Oh! That ceiling!
ReplyDeleteCan't wait to see your transformation. :)