Tape it off...tape it all off
Now I'm going to delve into the next few steps in painting the guest room. I decided I wanted to paint stripes in there, since it will someday be my creative space. It's kind-of the "woman cave," if you will. (James gets the garage!)
My color scheme for this room is gray and purple, but like a dark, dusty purple, not Barney the purple dinosaur purple. There will also be black and white accents. My tri-color stripes are going to be white, gray, and lighter gray.
So, painting 3 different colors of stripes might seem like a daunting task, but I did them once about 8 years ago in the bathroom at my parents house. I did those the hard way, and now I know the easy way, so I'm going to share it with you! My first experience with stripes went something like this: I knew I wanted black, white, and pink.

The walls were already white, so I taped off for the black stripes, then I taped off for the pink stripes...this process took me a VERY long time, and LOTS of painter's tape--which if any of you know much about painter's tape, you know it's not cheap.
This time, I knew I wanted 3 colors again, but I knew I had to approach it differently if I wanted to finish it this century and without blowing the whole reno budget on tape. So here's what I did...
First, James helped me mark the lines on the walls. Since I chose to do vertical stripes (much more slimming!), we used a chalk line instead of a laser level. He held the line at the top, and I was at the bottom. When the chalk line stopped moving, we knew it was level, and I would snap the line. Easy as pie, no laser level required! One tip I have if you're going to attempt this is to secure some sort of weight to the bottom of your string, it will help it level more quickly. (sorry, no pictures of this process...all hands were occupied). Here's what it looked like when we were done:


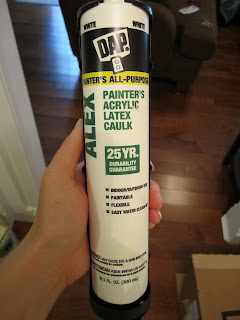
I left that to dry overnight. The next day, I started taping it off...taping it all off (haha, get it?). I used Scotch Blue Painter's Tape Edge Lock for Multiple Surfaces. I would have bought the delicate surfaces tape, since I had just painted the white the night before, but they didn't have it in 1.5" width. My white paint had somewhat covered the chalk lines, but I could still see them enough to tape. So I took my 1.5" painters tape (starting to understand why my white stripes are exactly 1.5" wide?) and started taping. Once it was all done, it looked like this:
 WHEW! My best suggestion for this is try to use a continuous piece of tape from top to bottom so there are no seams. Seams can allow for paint leakage, as well as they might be visible if you aren't able to perfectly match the 2 pieces of tape. So I started each piece at the top and smoothed it as I worked my way down the wall. I was able to do this by myself (well, with the assistance of a chair so I could reach the ceiling. I ain't Spiderman).
Did I mention we're only striping 2 of the walls?
 This is great because it doesn't matter where your last stripe ends, if they don't come out evenly. I'm OCD, so that probably would have bothered me. Also, the other two walls have windows/doors/closets, and I thought that might be difficult to get those vertical lines just right.
So, how did I decide on the width of my stripes? Basically, I just took a ruler and decided what looked best. For my wide stripes, I wanted 7" each. My skinny white stripes were based on the width of the painter's tape--I chose 1.5" tape (there is also 1" and 2" widths available). So I marked off every 8.5" when I chalked the lines (7" + 1.5" = 8.5". I got my college degree for that math).
The next step is to paint the wider stripes, alternating each one. When I pull the tape off, voila! I will have tri-color stripes, and I only taped off once! You are only limited by the width of tape you can purchase.
Happy taping!
My color scheme for this room is gray and purple, but like a dark, dusty purple, not Barney the purple dinosaur purple. There will also be black and white accents. My tri-color stripes are going to be white, gray, and lighter gray.
So, painting 3 different colors of stripes might seem like a daunting task, but I did them once about 8 years ago in the bathroom at my parents house. I did those the hard way, and now I know the easy way, so I'm going to share it with you! My first experience with stripes went something like this: I knew I wanted black, white, and pink.

The walls were already white, so I taped off for the black stripes, then I taped off for the pink stripes...this process took me a VERY long time, and LOTS of painter's tape--which if any of you know much about painter's tape, you know it's not cheap.
This time, I knew I wanted 3 colors again, but I knew I had to approach it differently if I wanted to finish it this century and without blowing the whole reno budget on tape. So here's what I did...
First, James helped me mark the lines on the walls. Since I chose to do vertical stripes (much more slimming!), we used a chalk line instead of a laser level. He held the line at the top, and I was at the bottom. When the chalk line stopped moving, we knew it was level, and I would snap the line. Easy as pie, no laser level required! One tip I have if you're going to attempt this is to secure some sort of weight to the bottom of your string, it will help it level more quickly. (sorry, no pictures of this process...all hands were occupied). Here's what it looked like when we were done:

Yes, impressive--I know. James thought it looked kind-of cool like this, like a beach house with white-washed wooden slats on the wall. But I had a greater plan!! My next step was to repaint the white, because as I mentioned in the last post, this is the original builder flat white paint, and it was lookin' pretty rough. But being the lazy/cheap person that I am, I only wanted to paint the parts that were actually going to show white in the end (rather than painting the entire walls white). So...I knew my white stripes were going to be 1.5" wide, so I took a small 2" foam roller and painted white semi-gloss paint (we had leftover from painting the trim around the house) next to the chalk lines. Here's what that looked like when I was done:


Did I mention we're only striping 2 of the walls?

So, how did I decide on the width of my stripes? Basically, I just took a ruler and decided what looked best. For my wide stripes, I wanted 7" each. My skinny white stripes were based on the width of the painter's tape--I chose 1.5" tape (there is also 1" and 2" widths available). So I marked off every 8.5" when I chalked the lines (7" + 1.5" = 8.5". I got my college degree for that math).
The next step is to paint the wider stripes, alternating each one. When I pull the tape off, voila! I will have tri-color stripes, and I only taped off once! You are only limited by the width of tape you can purchase.
Happy taping!


I LOVED your Victoria's Secret bathroom. So cute! I love the stripes!
ReplyDeleteI still love that bathroom, even if it did take me forever!!
ReplyDelete