Posts

Curtains, Hardware, and a Cookout

Image
So this past weekend, we didn't make much progress on the "house remodel" but we did make a lot of progress on making the house presentable! We had a cookout for some of my coworkers, so we had to clean basically every square inch of the house, garage, and yard. There ended up being 16 people over...18 including me and James! (oh, and 3 dogs). Group pic on the stairs! Thank goodness the stairs held for this picture! So anyway, we cleaned up all the tools from around the house, organized the garage, tidied up the yard and patio furniture, etc. The house hasn't been this clean in...ever! Just look at the dining room: Yeah, we still have to paint the corner blocks and touch up the paint on the trim, but I think it finally looks like a room!! In hindsight, we should have centered this artwork vertically as well as horizontally...maybe someday we'll fix it, but right now I'm just happy it's not on the floor leaning against the wall. Here's a ...

My favorite part of installing trim...

Image
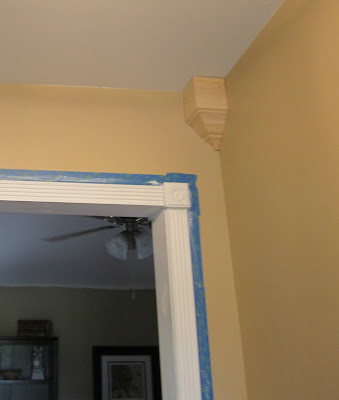
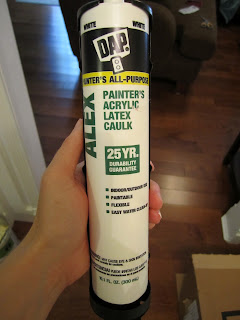
...and by "favorite," I obviously mean least favorite, worst part of installing new trim: caulking and filling nail holes. What you'll need if you're about to tackle a caulking project: Painter's caulk (duh) Caulking gun Paper towls Wet rag That's it! We chose to use DAP brand Painter's Acrylic Latex Caulk for about $1.52 a tube at Lowes.   One tube can get you pretty far, but we have a lot of trim (wainscoting, chair rail, etc.) so I estimated about one tube per room. Make sure you get the paintable kind!! So as a reminder, here's a picture of a corner of crown moulding pre-caulk. It's all gappy and ugly, right? Here it is with the caulk fresh out of the caulking gun, still all goopy and messy. Not much better, really... Here's where the magic happens. The only tool you need for smoothing caulk is...wait for it...your finger! You don't need one of those "pro caulk" tools or anything, so don't waste y...

James' Birthday

Image
Okay, so we lost a little progress this weekend because we went to Gatlinburg/Pigeon Forge to celebrate James' birthday!! But it was totally worth it, we both needed a break. I didn't check my email once the entire weekend...work or personal. Yay me!! Here's my favorite picture from the weekend: I know, we're quite an attractive couple! (the scenic background goes a long way in making us look good) James also took a vacation day on his actual birthday on Monday, but some of us don't get as many vacation days and had to go back to work. While I was slaving away at the office, he did this: Yes, he finally started installing the bead-board and chair rail in the dining room! That is one of the first rooms I painted, and it has been half-painted since October, proven by this picture: This is the only room James helped paint, so he had to leave his mark. See what I mean by half-painted? We knew we were going to install bead-board, so why waste effort pain...

Fiona: 12 weeks update

Image
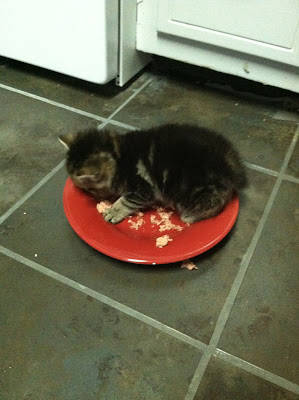
Fiona is 12 weeks old, and we've had her for 8 weeks today! As a reminder, here she was the first night at 4 weeks old: Here she is again at 8 weeks old:  And here she is now at 12 weeks old: Wow, she's growing so quickly! Her markings are getting prettier, too. Here's another picture of her face, cuz she's CUTE. I'll update again in another 4 weeks!

Trim, trim, and more trim

Image
Yeah you guessed it, this is an update about trim. We finally got James' tools back after he lent them to a friend, so we were able to put up the crown molding in the entryway and dining room. We were tired of messing with figuring out the right angles for crown (upside down and backwards?? WHAT?!), so we decided to cheat and get corner blocks: No, it's not meant to be the same color as the wall, it just looks close. It will get painted white.   If you're going to be hanging crown any time soon, we found that the easiest way is to find and mark your studs first, like so: Then, just start at one end with a pneumatic nail gun and work your way to the other end, putting in one nail on the bottom and one on the top at each stud. You can also use nails wherever it looks gappy. Yeah, that's an official term. The pressure from the pneumatic nail gun should suck most gaps closed. Here's the first piece all done: Much easier than the whole "upside dow...

A few updates

Image
First, I've been working on the guest/craft/office room the last week. The old shelves I had were the cheapy comes-in-a-box-fiberboard variety, and they didn't survive the move. (The sudden rain/hail storm we drove through certainly didn't help). Anyway, I needed some new shelves. I didn't want to get the same cheap shelves again, so I started scouring the internet. I found these shelves on Target.com, and using my Target Debit card, I got a 5% discount and free shipping right to the front door...can't beat that! I was able to put them together on my own. They're not entirely hardwood, like they look, but they're certainly a step up from these , and for not much more money. So here they are all put together, with LOTS of stuff on them already! Next, James and I decided to finally hang some artwork in the living room. Not only are the walls blank and lonely, all of the artwork has been taking up space sitting around in the guest room and dining room, ju...

CLEARANCE!!! brag post

Image
Normally I would brag about these sorts of purchases to my mom, but since I don't live near her I have to call with my clearance brags, and I'm gonna post them so y'all can see, too! After all, I am Ms. McFRUGAL :) A couple months ago I found this cute mirror at Target, normally $30 marked down to $9! It's gonna look SO CUTE in the guest room, in all of its whimsical glory.   Next is this set of card table and chairs...I kept seeing them in the store and finally bought the last one! They were originally $55, marked down to $27. The corner was a bit damaged, but I figured it was still a good deal. (To buy the table alone would be $30!) Next, my friend and I were at Michaels looking for ribbons and feathers to decorate her Steeplechase hat, and I happened across the Wilton section of the store. They had a cake decorating kit on clearance, regularly $35 marked down to $23.99. I was still hesitant to buy it, but after price comparing the cost of all the tips...